
eye candy pigments in epoxy resin mixing instructions
Discover how to create stunning epoxy resin projects with eye-catching pigments. Learn expert mixing tips for vibrant, professional results.
Epoxy resin projects are elevated by Eye Candy Pigments‚ offering vibrant colors and stunning effects. These pigments enhance creativity‚ providing shimmer‚ metallic‚ and opaque finishes for unique designs.
Overview of Eye Candy Pigments and Their Popularity
Eye Candy Pigments have gained immense popularity for their vibrant colors and versatility in epoxy resin projects. Known for their high-quality mica powders and pigment pastes‚ they offer shimmering‚ metallic‚ and opaque effects. Artists and DIY enthusiasts favor them for their ease of use and consistent results. With a wide range of colors‚ they inspire creativity in projects like live edge river tables‚ jewelry‚ and home decor‚ making them a top choice for achieving stunning‚ professional-looking finishes.
Importance of Proper Mixing Techniques for Optimal Results
Proper mixing is crucial for achieving uniform color and durability in epoxy resin projects. Eye Candy Pigments require precise ratios and thorough stirring to prevent uneven distribution. Slow‚ steady mixing avoids air bubbles‚ ensuring a smooth finish. Using the right tools‚ like mixing sticks and cups‚ enhances consistency. Maintaining accurate resin-to-hardener ratios and a controlled workspace temperature further guarantees professional-grade results‚ making each project vibrant and long-lasting.
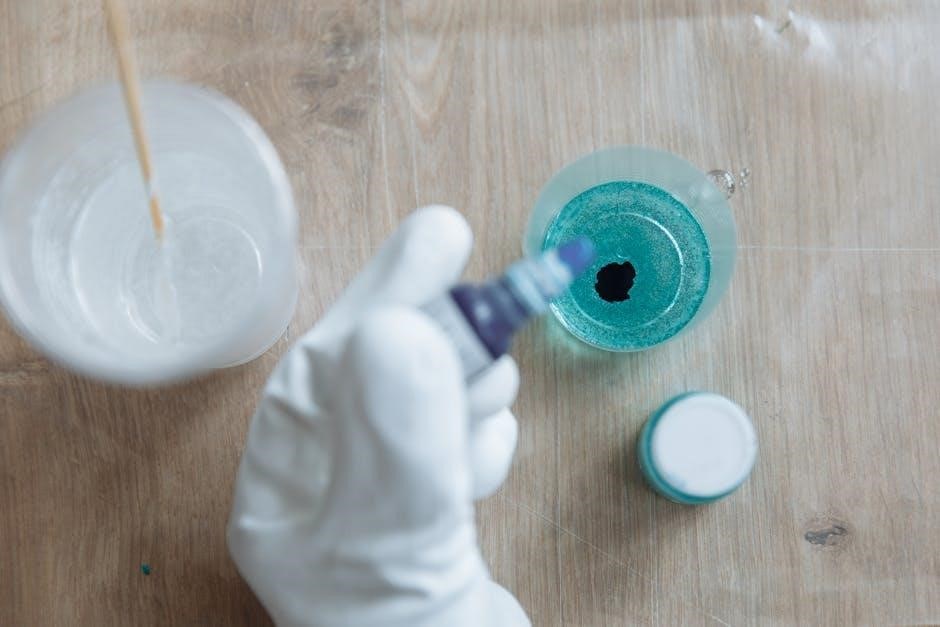
Materials and Tools Needed for Mixing
Epoxy resin‚ hardener‚ Eye Candy Pigments‚ mixing cups‚ stir sticks‚ gloves‚ and molds are essential for a successful project. Proper tools ensure precise measurements and even distribution.
Essential Components: Epoxy Resin‚ Hardener‚ and Pigments
Epoxy resin‚ hardener‚ and Eye Candy Pigments are the core materials for a successful project. The resin serves as the base‚ while the hardener initiates curing. Pigments‚ like mica powders or pastes‚ add color and effects. Available in metallic‚ opaque‚ and color-shifting options‚ they enhance the resin’s aesthetic. Start with small pigment amounts for desired hues‚ ensuring vibrant‚ long-lasting results. Proper ratios and mixing techniques are key for optimal outcomes.
Recommended Tools: Mixing Cups‚ Stir Sticks‚ and Gloves
Mixing cups‚ stir sticks‚ and gloves are essential for safe and efficient epoxy resin projects. Use sturdy cups for accurate measurements and even pigment distribution. Stir sticks ensure thorough mixing‚ preventing uneven color. Gloves protect hands from sticky resin and pigments. A well-prepared workspace with these tools enhances creativity and minimizes risks‚ ensuring smooth project execution with Eye Candy Pigments.
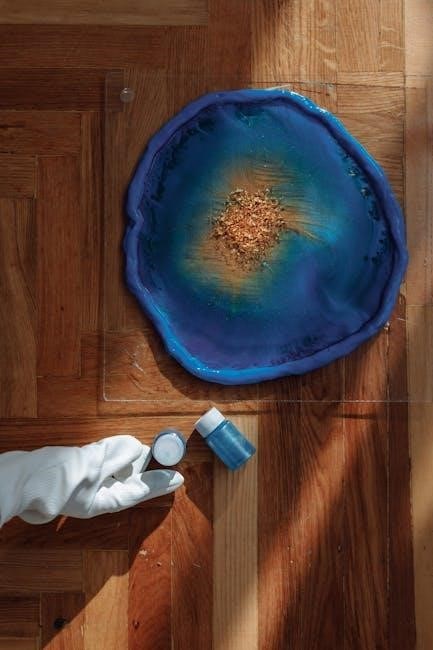
The Role of Molds in Shaping Your Epoxy Resin Project
Molds are crucial for defining the shape and appearance of your epoxy resin project. From silicone coaster molds to intricate serving board designs‚ molds ensure precise forms and smooth finishes. They allow for creative freedom‚ enabling the production of unique pieces like live edge river tables or charcuterie boards. Properly prepared molds prevent spills and ensure efficient curing‚ making them an indispensable tool for achieving professional-grade results with Eye Candy Pigments.
Step-by-Step Mixing Instructions
Measure epoxy resin and hardener accurately‚ mix thoroughly‚ then add Eye Candy Pigments. Stir slowly to avoid bubbles and ensure uniform color distribution before pouring into molds.
Measuring and Combining Epoxy Resin and Hardener
Accurate measurement is crucial for proper epoxy curing. Use a digital scale or measuring cups to ensure the correct resin-to-hardener ratio‚ typically 1:1 or 2:1. Pour components into a mixing cup‚ stirring thoroughly with a stick for 2-3 minutes. Avoid introducing bubbles by stirring slowly. Ensure no streaks remain for a homogeneous mix. Properly combined epoxy cures evenly‚ essential for vibrant pigment dispersion and durable results in your project.
Adding Eye Candy Pigments to the Resin Mixture
Add Eye Candy Pigments gradually to the mixed epoxy resin. Start with a small amount‚ stirring gently to avoid air bubbles. For metallic or opaque effects‚ use pigment pastes. Ensure uniform color distribution by mixing thoroughly. Test the hue on a small area if needed. The vibrant‚ shimmering pigments enhance the resin’s aesthetic‚ creating stunning results in projects like river tables or resin art. A little pigment goes a long way for desired effects.
Mixing Thoroughly to Achieve Uniform Color Distribution
Thorough mixing is crucial for uniform color distribution. Use a stir stick to blend the epoxy resin and Eye Candy Pigments slowly‚ avoiding air bubbles. Ensure the mixture is even by scraping the sides and bottom of the mixing cup. This step guarantees vibrant‚ consistent colors and prevents uneven pigmentation. Proper mixing enhances the final appearance of your epoxy resin project‚ whether it’s a river table or resin art.
Pouring the Mixture into the Mold
Pour the mixed epoxy resin and pigment mixture into your prepared mold slowly to avoid air bubbles. Use a stir stick or heat gun to remove any trapped air. Ensure the mold is level and securely positioned. For intricate designs‚ tape the mold edges to prevent overflow. Allow the mixture to settle slightly before proceeding. Proper pouring ensures a smooth‚ bubble-free finish‚ enhancing the final appearance of your epoxy resin project.
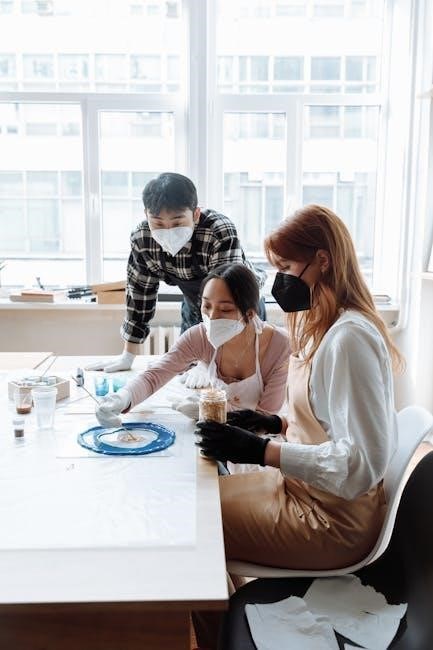
Safety Precautions and Workspace Preparation
Wear gloves‚ goggles‚ and a respirator to protect against chemical exposure. Ensure good ventilation‚ use a drop cloth‚ and organize tools. Prepare your workspace carefully to avoid spills and ensure safety during the mixing process.
Protective Gear: Gloves‚ Goggles‚ and a Respirator
Protective gear is essential when mixing epoxy resin and pigments. Wear gloves to prevent skin irritation‚ goggles to safeguard eyes‚ and a respirator to avoid inhaling harmful fumes. These precautions ensure safety and prevent accidental exposure to chemicals. Always work in a well-ventilated area and use a drop cloth to contain spills. Proper protective equipment minimizes risks‚ allowing you to focus on creating stunning epoxy resin projects with confidence and safety.
Ensuring Proper Ventilation and Workspace Cleanup
A well-ventilated workspace is crucial when mixing epoxy resin and pigments to prevent inhaling harmful fumes. Use a drop cloth to protect surfaces from spills and ensure easy cleanup. Organize tools like mixing sticks and measuring cups for efficiency. Proper ventilation and a clean workspace minimize risks and ensure a safer‚ more enjoyable creative process with Eye Candy Pigments.
Tips for Achieving Vibrant and Consistent Colors
Start with small pigment amounts‚ gradually adding until desired hues are achieved. Use white as a base for lighter tones and pigment pastes for opaque finishes.
Starting with Small Amounts of Pigment for Desired Hue
Begin with minimal pigment to avoid over-saturation. A little goes a long way‚ and excess can muddy the color. Add a small amount‚ mix thoroughly‚ and gradually increase until the desired hue is achieved. This ensures vibrant‚ consistent results without wasting material. Starting small allows for precise control‚ preventing overly dark or uneven tones. Mix well between additions to maintain even distribution and achieve the perfect shade effortlessly.

Using Pigment Pastes for Opaque and Metallic Effects
Pigment pastes are ideal for achieving opaque and metallic finishes in epoxy resin. Start with a small amount‚ as they are highly concentrated. Mix thoroughly to ensure even distribution and vibrant color. These pastes are perfect for creating bold‚ solid hues or adding shimmering metallic effects. They are versatile and can be layered or blended for unique artistic results‚ ensuring long-lasting‚ professional-quality finishes in your resin projects.
Troubleshooting Common Issues
Addressing Uneven Color Distribution and Bubbles
Uneven color distribution often results from insufficient mixing or improper pigment-to-resin ratios. To fix‚ ensure thorough mixing and use the right tools. Bubbles can form due to air entrapment during mixing or pouring. Eliminate them by gently tapping the mold or using a heat gun. Proper workspace preparation and maintaining consistent temperatures also help prevent these issues‚ ensuring smooth‚ professional-looking finishes in your epoxy resin projects.
Uneven color distribution and bubbles are common issues in epoxy resin mixing. To fix uneven colors‚ ensure proper pigment-to-resin ratios and mix thoroughly. Bubbles form due to air entrapment during mixing or pouring. To eliminate them‚ gently tap the mold or use a heat gun. Proper workspace preparation‚ including consistent temperatures‚ helps prevent these issues. Using high-quality tools like mixing sticks can also improve results‚ ensuring a smooth and professional finish for your projects with Eye Candy Pigments.
Adjusting Pigment Ratios for Better Results
Start with small pigment amounts to achieve desired hues. Add gradually‚ mixing thoroughly‚ and test the color before finalizing. A little pigment goes a long way. Proper dispersion ensures even distribution. Adjust ratios based on project needs‚ ensuring optimal color intensity. This method prevents over-saturation and enhances the epoxy resin’s clarity‚ resulting in professional-looking finishes with Eye Candy Pigments.

Popular Projects Using Eye Candy Pigments
Epoxy resin projects like live edge river tables‚ custom jewelry‚ coasters‚ and home decor items are enhanced with Eye Candy Pigments‚ creating vibrant‚ professional finishes and unique designs.
Creating Live Edge River Tables and Resin Art
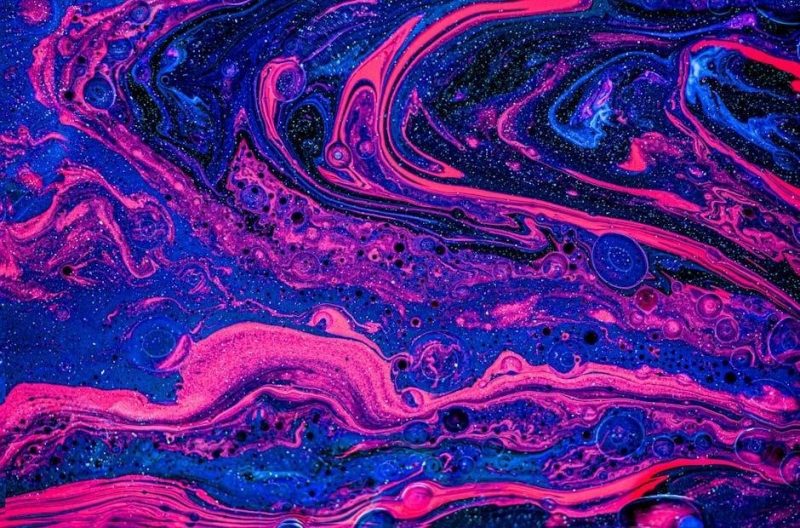
Epoxy resin projects like live edge river tables and resin art benefit from Eye Candy Pigments‚ which add shimmer and vibrant colors. These pigments create stunning metallic and color-shifting effects‚ enhancing the natural beauty of live edge wood. Artists often combine them with alcohol inks for unique‚ flowing patterns. The result is a durable‚ eye-catching piece that showcases the perfect blend of resin and pigment artistry‚ making each project truly stand out.
Custom Jewelry‚ Coasters‚ and Home Decor Items
Epoxy resin and Eye Candy Pigments are perfect for creating unique jewelry‚ coasters‚ and home decor. These pigments add shimmer and vibrant colors‚ making each piece stand out. From delicate jewelry to functional coasters‚ the versatility of epoxy resin allows for endless creativity. Custom designs can be personalized with various pigment effects‚ ensuring durability and beauty. This makes them ideal for gifts or adding a personal touch to your home decor‚ inspiring both practicality and artistic expression.
The Science Behind Pigment and Resin Interaction
The interaction between pigments and epoxy resin involves chemical bonding and physical dispersion‚ where particle size and distribution determine color vibrancy and finish durability.
How Pigments Enhance the Aesthetic of Epoxy Resin
Epoxy resin’s aesthetic appeal is dramatically enhanced by pigments‚ which add vibrant colors‚ shimmer‚ and unique effects. Eye Candy Pigments‚ with their metallic‚ pearlescent‚ and opaque options‚ create stunning visual depth. These pigments transform plain resin into eye-catching works of art‚ perfect for river tables‚ jewelry‚ and home decor. Their compatibility with various techniques ensures versatile and professional-looking results‚ making them indispensable for creative projects.
The Role of Particle Size and Pigment Type
The particle size and type of Eye Candy Pigments significantly influence the epoxy resin’s final appearance. Smaller particles ensure even dispersion and a smooth finish‚ while larger particles create textured‚ sparkly effects. Metallic and pearlescent pigments add shimmer and depth‚ enhancing the resin’s aesthetic appeal. The right combination of particle size and pigment type allows for customized effects‚ from subtle hues to dazzling metallic finishes‚ making each project uniquely visually striking and professional-looking.
Eye Candy Pigments bring unmatched vibrancy and creativity to epoxy resin projects. With their ease of use and stunning effects‚ they inspire artists to push creative boundaries and achieve breathtaking results.
Summarizing Key Points for Successful Mixing
Accurate measurements and proper mixing techniques are crucial for achieving desired results. Start with small pigment amounts and adjust gradually. Use quality tools like mixing sticks and molds. Ensure a well-prepared workspace with protective gear. Follow instructions carefully to avoid uneven distribution and bubbles. Experiment with pigment types and ratios to enhance effects. Safety and patience are key to creating stunning‚ professional-looking epoxy resin projects with Eye Candy Pigments.
Encouraging Creativity and Experimentation
Eye Candy Pigments inspire endless creativity in epoxy resin projects. Experiment with unique color combinations‚ layering techniques‚ and special effects like metallic shimmers or color-shifting hues. Try mixing pigments to create custom shades or adding textures for dimension. Don’t be afraid to push boundaries—every project is an opportunity to innovate and express your artistic vision‚ making each piece truly one-of-a-kind.