

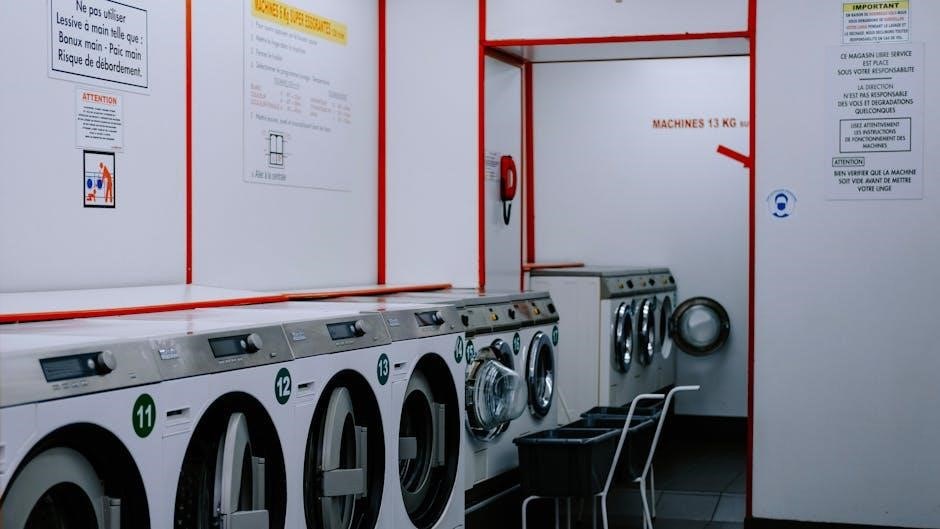
hoover smartwash instructions
Learn how to use Hoover SmartWash effortlessly. Follow our step-by-step guide for the best carpet cleaning results!
The Hoover SmartWash is an innovative automatic carpet cleaner designed for efficient and deep cleaning․ Popular models include FACSMCW20A and Plus FH52000, offering advanced features for easy use․

1․1 Overview of the Hoover SmartWash Series
The Hoover SmartWash series offers a range of innovative carpet cleaners designed for efficient and deep cleaning․ With models like FACSMCW20A, Plus FH52000, and PET Complete FH53000, the series caters to various cleaning needs․ These machines feature automatic cleaning modes, triggerless handles, and large solution tanks for seamless operation․ The series is known for its user-friendly design, advanced features, and versatility, making it a popular choice for both regular and pet-specific cleaning tasks․
1․2 Key Features of the Hoover SmartWash
The Hoover SmartWash series boasts advanced features like automatic cleaning modes, a triggerless handle for effortless operation, and a large solution tank for extended cleaning sessions․ Its sleek design ensures easy maneuverability, while the built-in pretreat wand enhances stain removal․ Additionally, the series offers compatibility with Hoover cleaning solutions, optimizing results․ These features make the SmartWash a versatile and efficient choice for deep carpet cleaning and maintenance․

Hoover SmartWash Models
The Hoover SmartWash series includes models like FACSMCW20A, FH52000, and FH53000, each designed for specific cleaning needs and offering unique features for optimal performance․
2․1 Hoover SmartWash FACSMCW20A
The Hoover SmartWash FACSMCW20A is an automatic carpet cleaner designed for efficient deep cleaning․ It utilizes steam for effective stain removal and comes with a comprehensive 26-page manual․ Rated highly, this model offers innovative features for ease of use and thorough cleaning performance․ Ideal for household use, it ensures a safe and effective cleaning experience with its advanced technology․
2․2 Hoover SmartWash Plus FH52000
The Hoover SmartWash Plus FH52000 is a versatile and efficient vacuum cleaner designed for automatic carpet cleaning․ It features advanced automatic modes and a user-friendly design․ With a highly-rated manual, this model offers clear assembly and operation instructions․ Its popularity stems from its ease of use and effective cleaning performance, making it a top choice for household cleaning needs․ The FH52000 is known for its reliability and innovative features․
2․3 Hoover SmartWash PET Complete FH53000
The Hoover SmartWash PET Complete FH53000 is designed specifically for pet owners, offering advanced cleaning solutions for pet stains and odors․ This model features a 3․8-liter clean water tank and 1200W of power for deep cleaning․ It includes a pretreat wand for targeted stain removal and is compatible with Hoover cleaning solutions․ The FH53000 is a popular choice for households with pets, ensuring effective and efficient carpet cleaning with minimal effort․

Assembly and Setup Instructions
Assembly involves attaching the handle, installing the clean water tank, and completing initial setup steps․ Ensure all parts are securely connected for safe and proper function․
3․1 Attaching the Handle
To attach the handle, align it with the main body of the Hoover SmartWash and slide it into place until you hear a click․ Ensure it is securely locked to maintain stability during use․ This step is crucial for proper operation and maneuverability․ Always refer to the manual for visual guidance to confirm the handle is correctly installed before proceeding with other assembly steps․
3․2 Installing the Clean Water Tank
To install the clean water tank on the Hoover SmartWash, first locate the designated compartment on the machine, typically on the top or side․ Ensure the tank is empty or filled as per instructions to avoid overfilling, which could lead to leaks․ Align the tank with the machine’s connector or valve and secure it by clicking or screwing it into place․ Use any provided clips or locks to prevent it from coming loose during use․ Check that the tank is properly sealed to avoid leaks and test its stability by gently pulling on it․ If it feels loose, adjust or check for missed steps in the manual․ Proper installation is crucial for the machine’s performance and safety․ If unsure, refer to the manual’s diagrams or additional instructions․ Ensure hands are dry and clean to prevent contamination․ After installation, proceed to the next assembly steps, such as attaching the handle․ If issues arise, consult the troubleshooting section or seek online resources for guidance․ Correct installation ensures optimal cleaning results and prevents potential machine damage․

3․3 Initial Assembly Steps
Begin by carefully unpacking all components and verifying their condition․ Slide the handle into the base until it clicks securely into place․ Next, attach the clean water tank by aligning it with the designated compartment and snapping it into position․ Ensure all parts are properly aligned and locked to avoid leaks or instability․ Double-check that all connections are secure before proceeding to use the machine․ If unsure, refer to the manual for visual guidance or additional instructions․ Proper assembly ensures safe and effective operation of the Hoover SmartWash․ Always follow the manufacturer’s guidelines to prevent damage or malfunctions․ If any part seems loose or misaligned, adjust it immediately․ This step is crucial for achieving optimal cleaning results․ Consult the manual for specific diagrams or troubleshooting tips if needed․ Ensure all locks and clips are tightly secured to maintain stability during use․ Avoid over-tightening, as this could damage the components․ Once assembled, proceed to fill the solution tank and prepare for cleaning․ Regularly inspect the assembly for wear and tear to maintain performance․ If any issues arise, refer to the troubleshooting section or contact customer support․ Proper initial assembly is key to enjoying a seamless cleaning experience with your Hoover SmartWash․ Always prioritize safety and follow the provided instructions carefully․ By completing these steps, you can ensure your machine is ready for efficient and effective cleaning․ For further assistance, consult the user manual or online resources․ Remember, correct assembly is the foundation of proper functionality․ If you encounter any difficulties, do not hesitate to seek help․ Proper assembly ensures longevity and performance of the Hoover SmartWash․ Always handle the machine with care to maintain its quality and effectiveness․ Enjoy your cleaning experience with the Hoover SmartWash, knowing it is assembled correctly and safely․ Follow all safety precautions outlined in the manual to avoid accidents․ If unsure about any step, seek guidance to ensure a proper setup․ Your Hoover SmartWash is designed for ease of use, but proper assembly is essential for optimal results․ Take your time to ensure everything is correctly in place before use․ This will help you achieve the best cleaning outcomes and extend the life of your machine․ For additional support, visit the Hoover website or contact their customer service team․ They are available to assist with any assembly or operational questions you may have․ With proper assembly, your Hoover SmartWash will provide years of reliable service․ Always refer to the manual for specific instructions tailored to your model․ If you notice any missing or damaged parts, contact Hoover immediately for a replacement․ Proper assembly is the first step toward a satisfying cleaning experience․ Ensure all components are in perfect working condition before use․ If you are unsure about any part of the assembly process, do not proceed until you have clarified the steps․ This will prevent potential damage to the machine or injury to the user․ Your safety and the machine’s performance depend on correct assembly․ Take the time to do it right and enjoy the benefits of your Hoover SmartWash․ Always follow the manufacturer’s instructions to ensure proper assembly and safe operation․ If you encounter any challenges, remember that help is available through the manual or Hoover’s support team․ Proper assembly is just the beginning of your journey with the Hoover SmartWash․ Once everything is in place, you can explore its advanced features and enjoy effortless cleaning․ For the best results, make sure every step of the assembly process is completed accurately․ Your Hoover SmartWash is designed to make cleaning easier, but it requires proper setup to function at its best․ Take pride in your assembly work, and it will reward you with outstanding performance․ If you are still unsure, consider watching online tutorials or guides for additional clarification․ Proper assembly is a one-time effort that ensures long-term satisfaction․ Do not rush through the process, as attention to detail is crucial․ Your Hoover SmartWash will thank you with reliable service and exceptional cleaning power․ Always remember that proper assembly is the key to unlocking its full potential․ If you are short on time, schedule a session to complete the assembly without distractions․ This will help you avoid mistakes and ensure everything is done correctly․ Your Hoover SmartWash is a valuable investment, and proper assembly will protect it from unnecessary wear and tear․ Take the necessary time to ensure each part is securely and correctly attached․ If you are assembling it for the first time, consider enlisting a second pair of hands for assistance․ Proper assembly is a team effort that leads to a better cleaning experience․ For the best results, make sure all parts are aligned and secured as per the manual․ Your Hoover SmartWash is ready to deliver exceptional cleaning performance once properly assembled․ Do not skip any steps, as each one is vital for optimal functionality․ If you are still unsure, reach out to Hoover’s customer support for personalized guidance․ Proper assembly is the foundation of a satisfying experience with your Hoover SmartWash․ Take the time to do it right and enjoy the results․ Always prioritize proper assembly to ensure safety and effectiveness․ If you are unsure about any step, do not proceed until you are confident in your understanding․ Your Hoover SmartWash is designed to be user-friendly, but proper assembly is essential for its performance․ Take the necessary steps to ensure everything is in place before use․ Proper assembly is the first step toward achieving a cleaner and healthier home with your Hoover SmartWash․ Always refer to the manual for instructions specific to your model․ If you are still unsure, consider consulting a professional for assistance․ Proper assembly is crucial for the longevity and effectiveness of your Hoover SmartWash․ Take the time to ensure everything is correctly assembled, and you will be rewarded with years of reliable service․ For additional support, visit the Hoover website or contact their customer service team․ They are available to assist with any assembly or operational questions you may have․ Proper assembly is the key to unlocking the full potential of your Hoover SmartWash․ If you are unsure about any part of the process, do not hesitate to seek help․ Your safety and the machine’s performance depend on correct assembly․ Take the time to do it right and enjoy the benefits of your Hoover SmartWash․ Always follow the manufacturer’s instructions to ensure proper assembly and safe operation․ If you encounter any challenges, remember that help is available through the manual or Hoover’s support team․ Proper assembly is just the beginning of your journey with the Hoover SmartWash․ Once everything is in place, you can explore its advanced features and enjoy effortless cleaning․ For the best results, make sure every step of the assembly process is completed accurately․ Your Hoover SmartWash is designed to make cleaning easier, but it requires proper setup to function at its best․ Take pride in your assembly work, and it will reward you with outstanding performance․ If you are still unsure, consider watching online tutorials or guides for additional clarification․ Proper assembly is a one-time effort that ensures long-term satisfaction․ Do not rush through the process, as attention to detail is crucial․ Your Hoover SmartWash will thank you with reliable service and exceptional cleaning power․ Always remember that proper assembly is the key to unlocking its full potential․ If you are short on time, schedule a session to complete the assembly without distractions․ This will help you avoid mistakes and ensure everything is done correctly․ Your Hoover SmartWash is a valuable investment, and proper assembly will protect it from unnecessary wear and tear․ Take the necessary time to ensure each part is securely and correctly attached․ If you are assembling it for the first time, consider enlisting a second pair of hands for assistance․ Proper assembly is a team effort that leads to a better cleaning experience․ For the best results, make sure all parts are aligned and secured as per the manual․ Your Hoover SmartWash is ready to deliver exceptional cleaning performance once properly assembled․ Do not skip any steps, as each one is vital for optimal functionality․ If you are still unsure, reach out to Hoover’s customer support for personalized guidance․ Proper assembly is the foundation of a satisfying

Safety Instructions
Always read the manual carefully before use․ Wear protective gloves and ensure the area is clear of obstacles․ Keep children and pets away during operation․ Avoid using damaged cords or attachments, and never expose the machine to extreme temperatures․ Use only genuine Hoover parts to maintain safety and performance․ Ensure the machine is properly grounded and avoid cleaning unapproved surfaces․
4․1 Precautions Before Use
Before using the Hoover SmartWash, read the manual carefully and ensure you understand all instructions․ Check for any damage to cords or attachments and avoid using the machine if damaged․ Keep the cleaning area clear of obstacles and ensure good ventilation․ Wear protective gloves and eyewear․ Avoid using the machine near water or in humid environments; Keep children and pets away during operation․ Do not leave the machine unattended while in use․ Unplug it when not in operation․
4․2 Grounding Instructions
Always use the Hoover SmartWash with a properly grounded electrical outlet to ensure safe operation․ Regularly inspect the power cord for any signs of damage or wear․ If damaged, do not use the machine and contact a professional for repairs․ Never attempt to bypass the grounding plug, as this can lead to electrical shocks or malfunctions․ Proper grounding is essential for user safety and optimal performance․
4․3 Safety Guidelines for Operation
Always read the manual before use․ Keep children and pets away while operating․ Avoid using the machine on hot or sharp objects․ Ensure the area is clear of obstacles․ Use only Hoover-approved cleaning solutions to prevent damage․ Never leave the device unattended while in operation․ Keep the machine on a stable, flat surface to avoid tipping․ Regularly inspect for damage and ensure all parts are securely attached before use․ Store the device in a dry, cool place after cleaning․

Operating the Hoover SmartWash
The Hoover SmartWash operates efficiently with a triggerless handle and automatic cleaning mode․ Simply fill the solution tank, select your mode, and glide effortlessly for deep cleaning results․

Accessories and Additional Tools
5․1 Filling the Solution Tank
To fill the solution tank, first remove it from the machine․ Use Hoover-approved cleaning solution, following the instructions on page 10․ Do not exceed the maximum fill line․ Reattach the tank securely to ensure proper operation․ Always check for leaks before use․ This ensures optimal cleaning performance and prevents damage to the device․